..这台电脑刚到我手上时..满是灰尘..而且连BIOS都进不了..

....原本看了看..准备把它丢到垃圾堆的..实在懒得搞它..

..因为种种原因..

..所以只好死马当活马医了..

..
..先将整台硬体分解..主机板先使用酒精与棉花棒清洁干净..CPU与CPU散热器打磨抛光.....北桥更换散热膏..钻石奈米级的喔..

..再加一只七彩散热风扇..接着主机板上一些容易发热的晶片..全上散热片..

..嘿嘿..为超频做准备..这些是一定要的啦..机壳风扇全部更换..当然要换成蓝光的啰..IDE排线也都换掉..

..就这样..组装起来..

..靠..哇咧..

..整理到一半..才忽然想到拍照..XD..

..所以重整的过程照片不太完整..多包含耶..

..
..OK..送电..开机..耶..

......喔哦..哇啊..

..忙了4.5个小时..怎么还是in不起来..

..真是..#*:@!?%$#""..

..此时我家的长毛狗都躲起来了..我的脸色粉难看..又再一次想把它都丢到垃圾筒..机车咧..

..
..喝个可乐..喘口气先..

..呼..继续奋斗..先把硬碟拿到我的电脑检查一下..赶..满满的毒..

..XD咧..删除分割区..重新分割与格式化..接着检查记忆体..啊哈..

..逮到凶手..记忆体其中一支挂了..拿掉它就能进BIOS..有听到B一声..但看不到画面..唉..

..去哪找AGP的显示卡来试呢..马上飙出门..

..买一片去..6800入手..赶紧上机..嘿嘿..

..终于画面出来了..耶..

..紧接着重灌系统..上网抓驱动..经过一番测试调教..

..哈哈..满意..焕然一新..
..CPU..2.40G超频至3.00G..待机温度都约在32度左右..记忆体DDR400..不超频..还稍微降频跑..显示卡也超频..将效能提升20%..

..唔..它终于像一台电脑了..反应灵敏..画质赞..

..哈哈..爽啊..
..结果..这个时候刚好朋友来看看成果..一看..

..二话不说..就急着抱走..连让我把测试图片抓下来都不肯..

..XD咧..早知道也说还没好..

..没图没真相..

..抱歉大大们..

..图片不全的部份只好靠大大们的想像力拼凑起来了..

..
主机板清洁过程 ..先用毛刷把机板灰尘清干净..接着用干净的干布沾酒精先把机板大略擦拭一番..然后使用绵花棒沾酒精做细部擦拭..完成后..用汽车喷腊轻轻喷上一层..再用干布与棉花棒擦拭一遍..这样你就拥有一片干净又发亮的机板了..
..
机壳内部清理过程
..先将内部硬体零件拆下清空..接着喷上厨房白博士..再用湿布擦拭干净..完成后使用吹风机吹干..再用干布沾酒精擦拭一番..将污垢与灰尘都搞定后..喷上一层汽车腊..再用干布擦一擦..嘿嘿..又拥有一咖干净发亮的机壳..
..
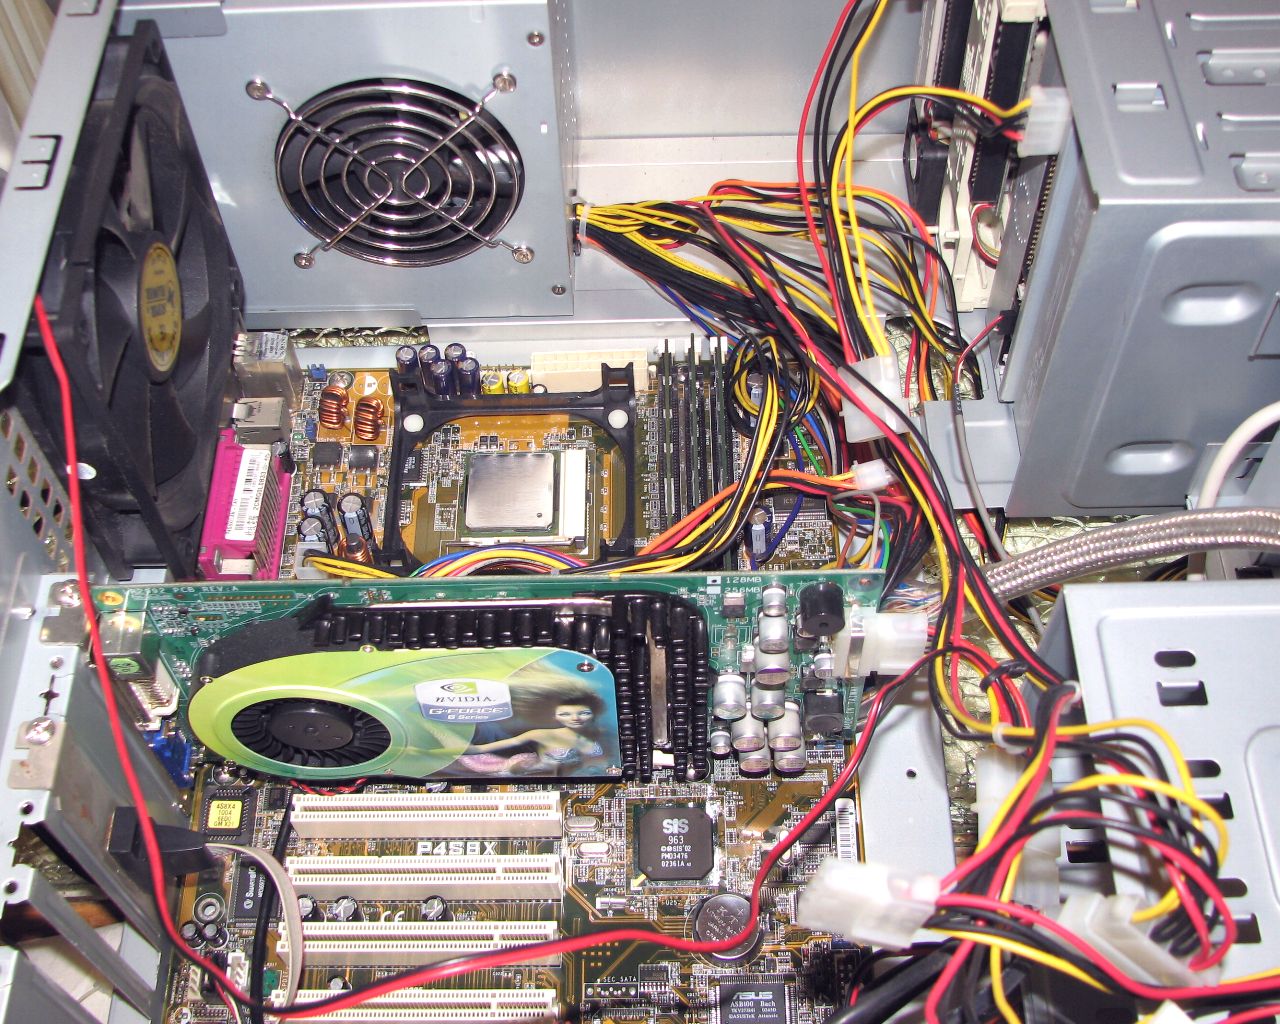
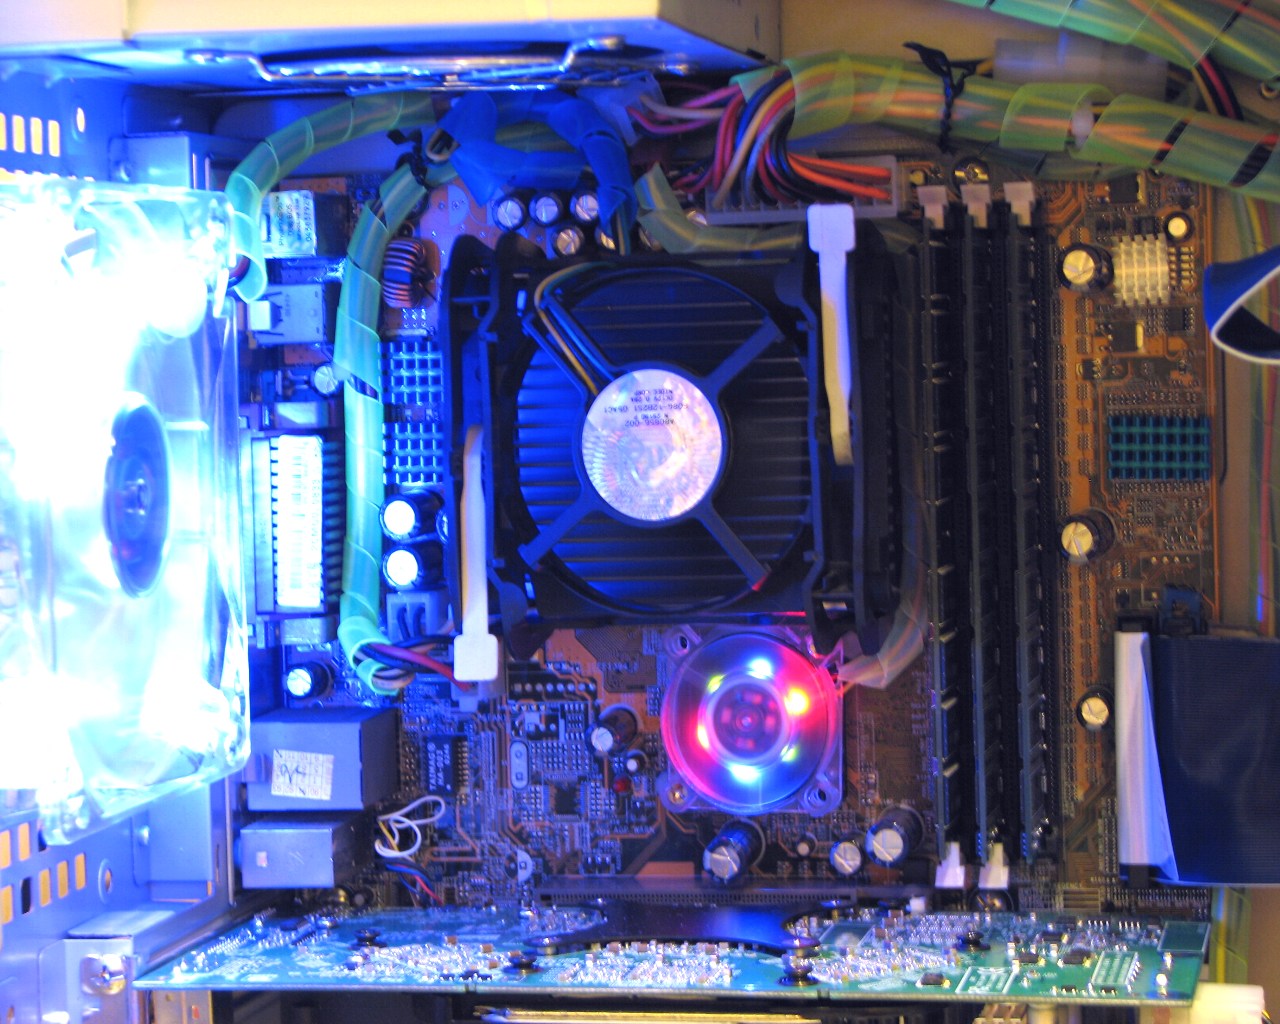
此张图片已经都清洁完毕在组装了..
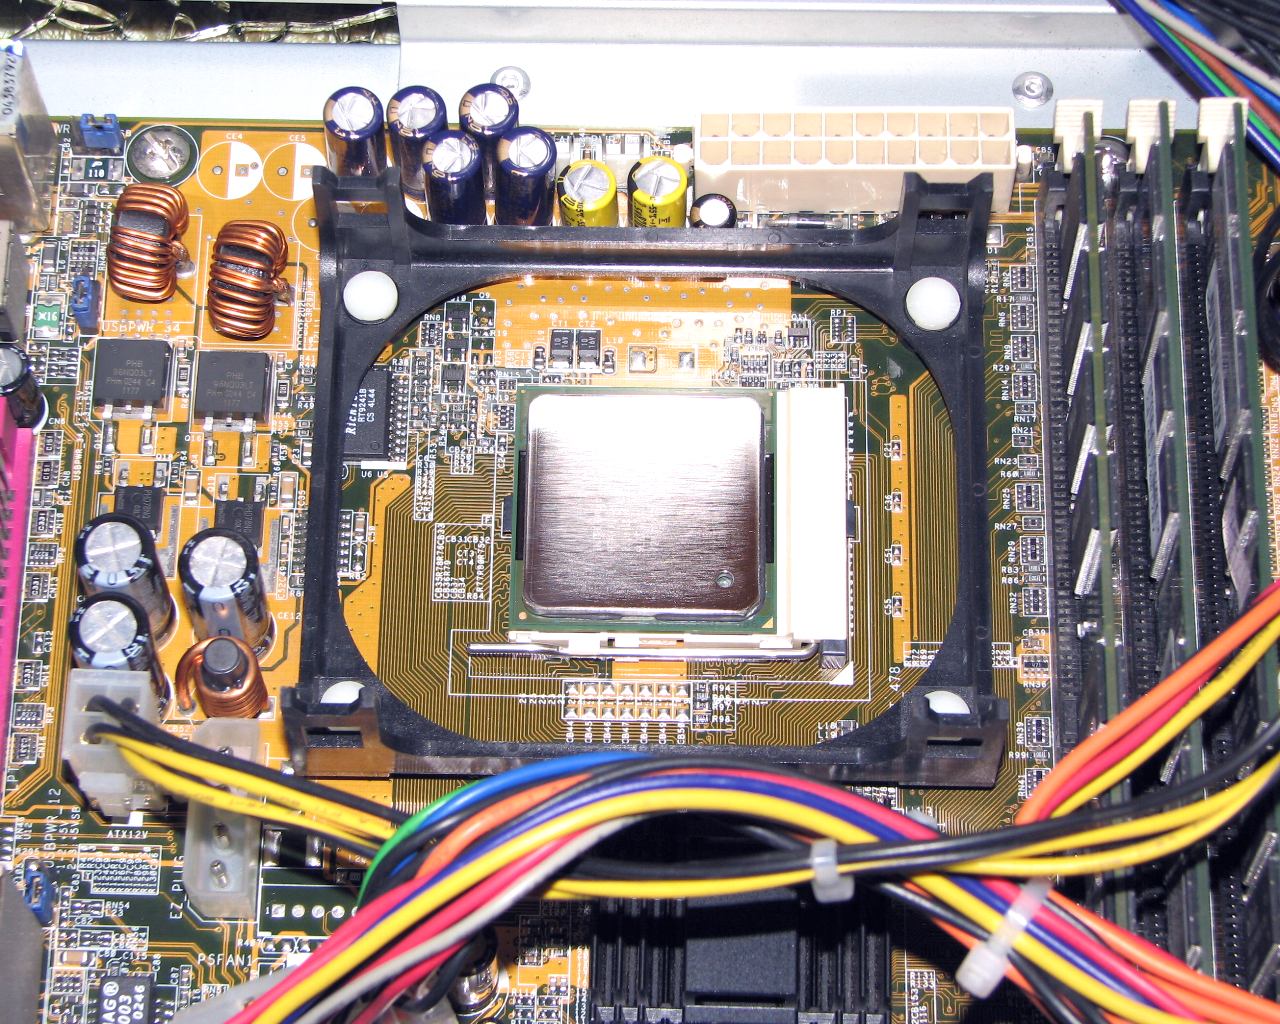
CPU抛光
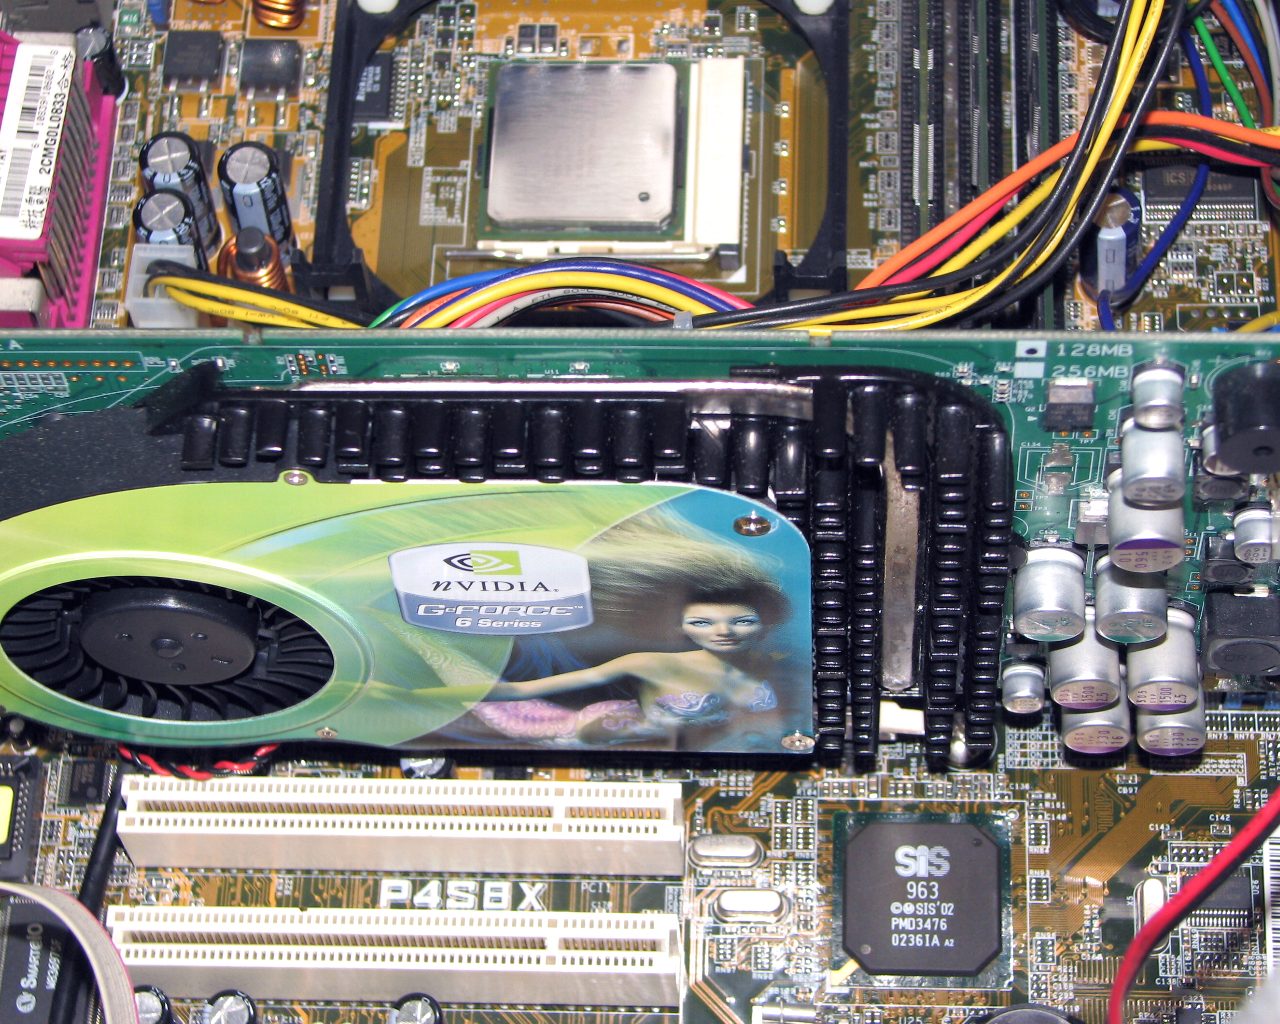
6800显示卡
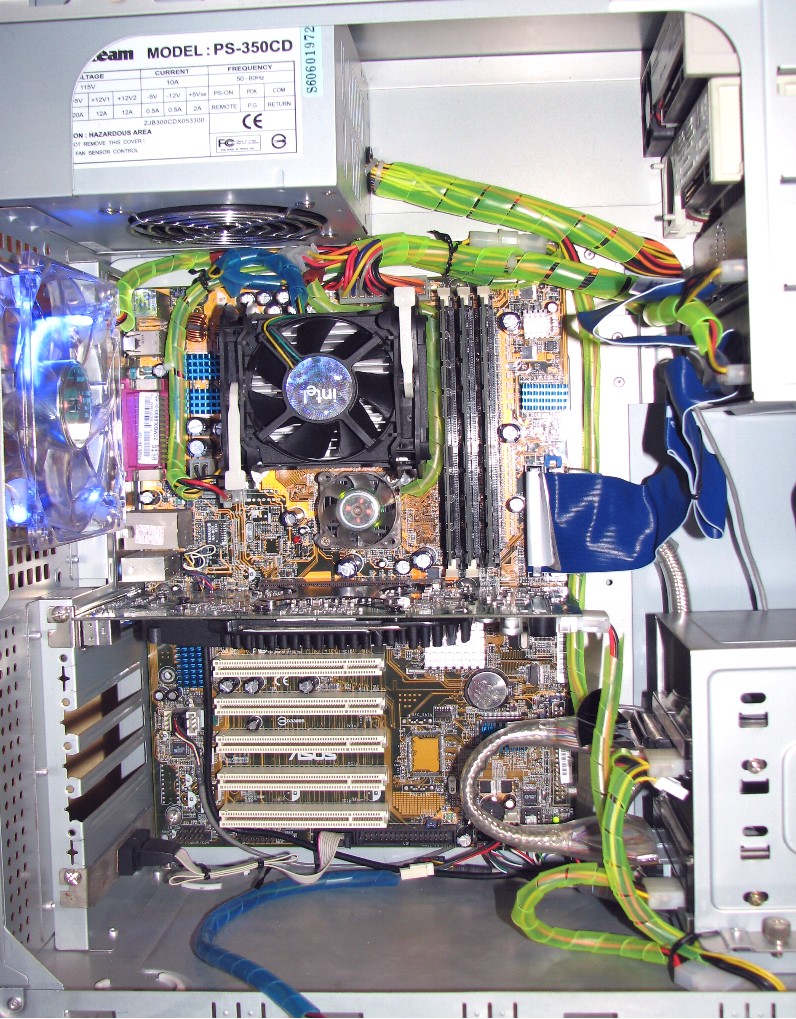
..内部线路整理..图片1..
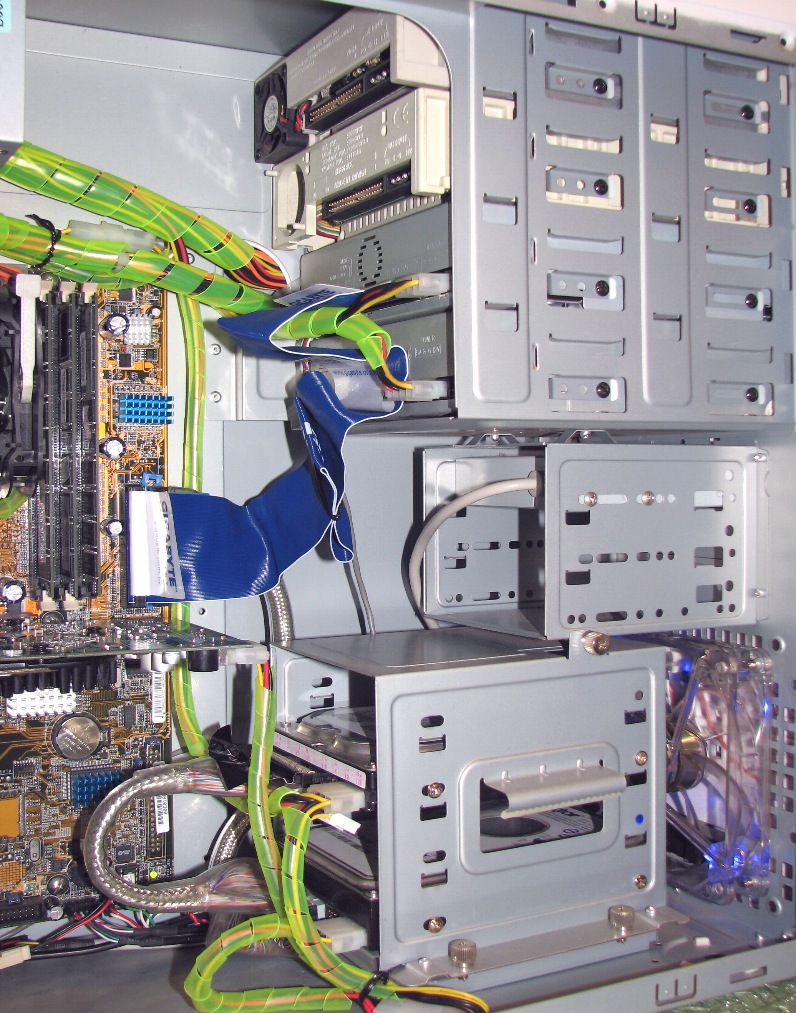
..内部线路整理..图片2..
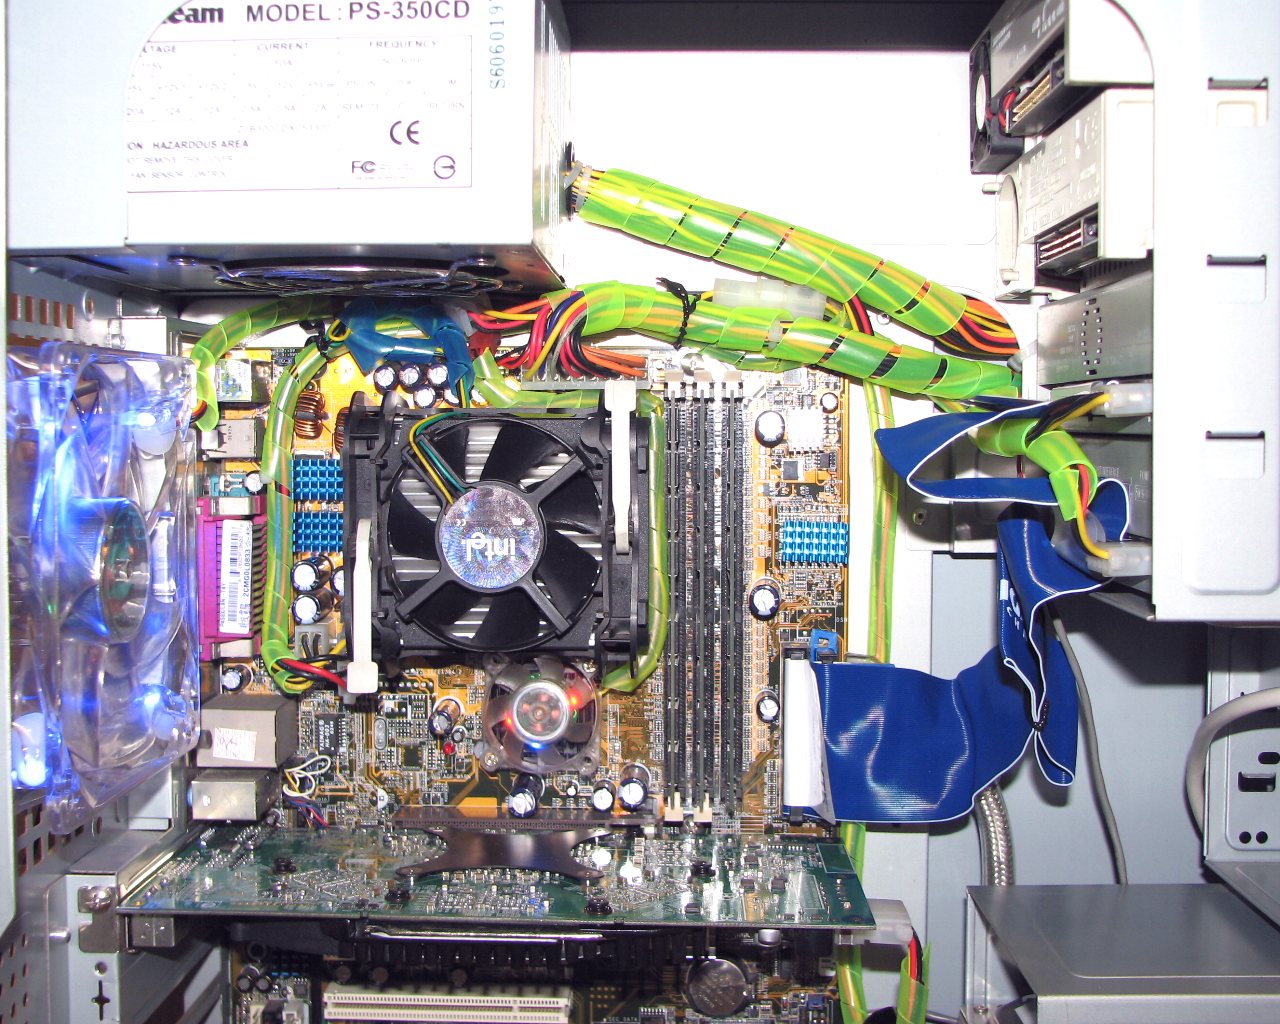
..内部线路整理..图片3..
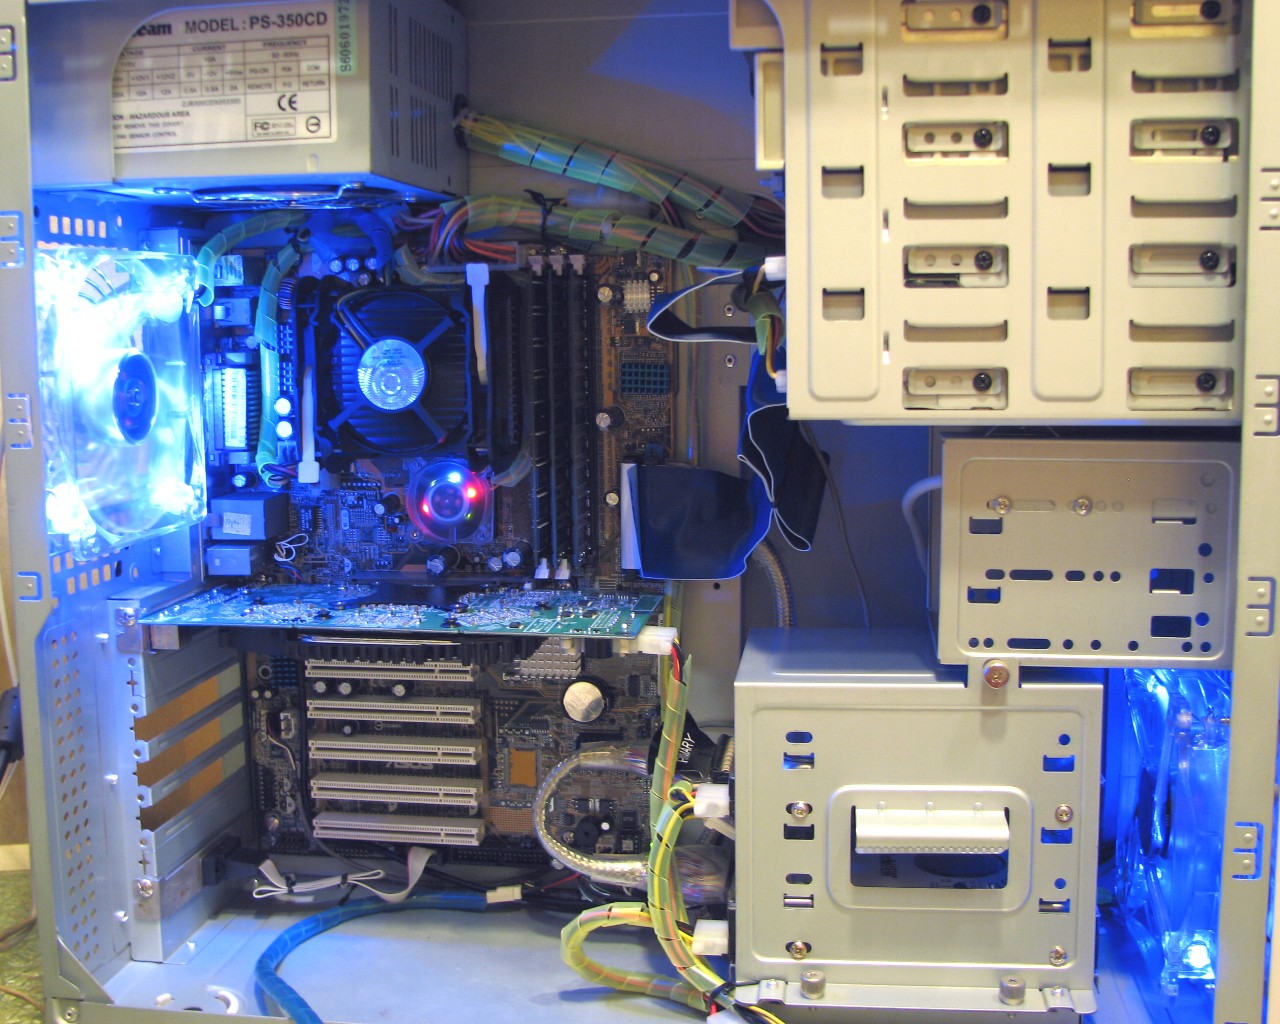
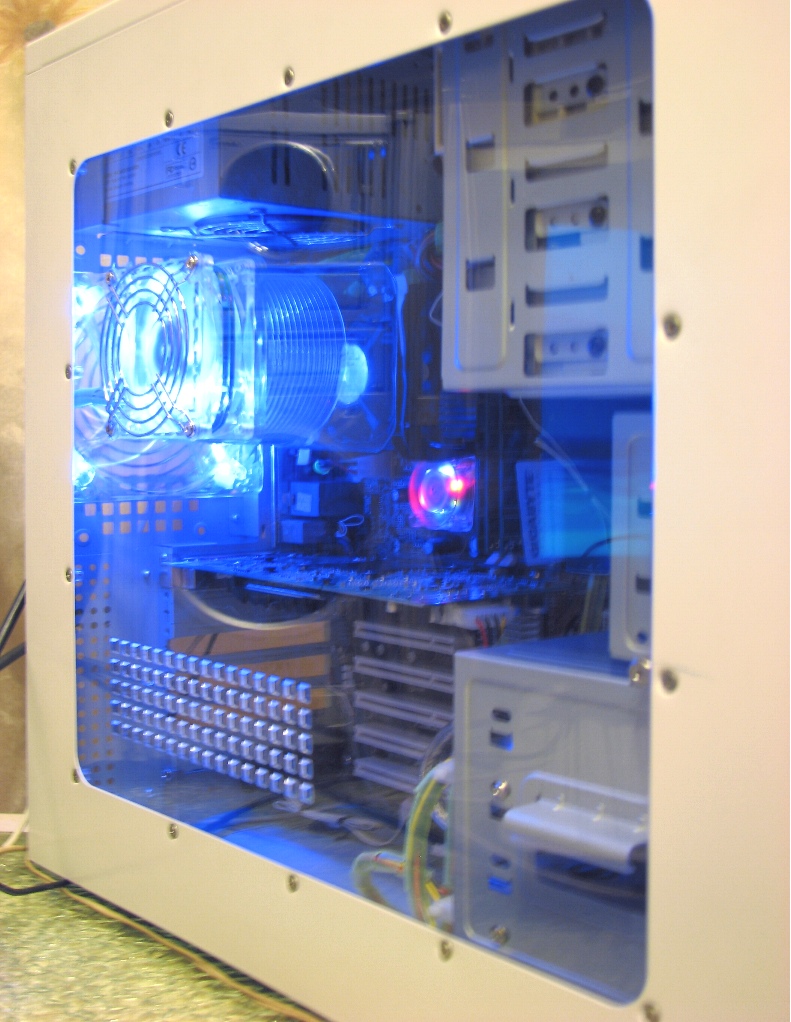
夜光照 1
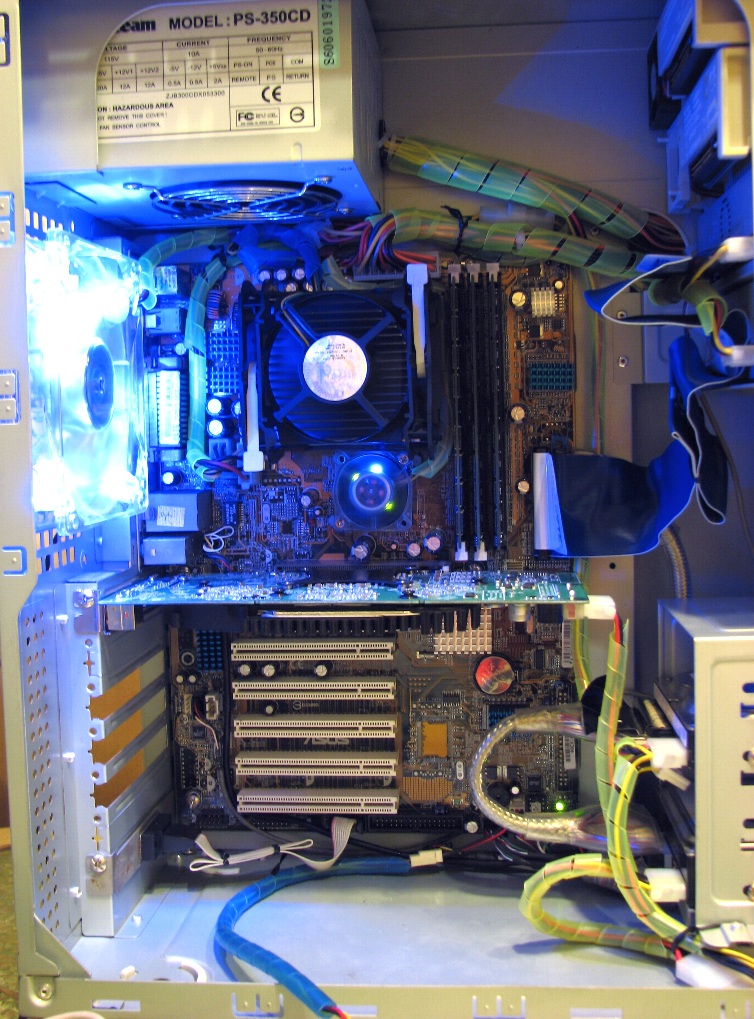
夜光照 2
夜光照 3
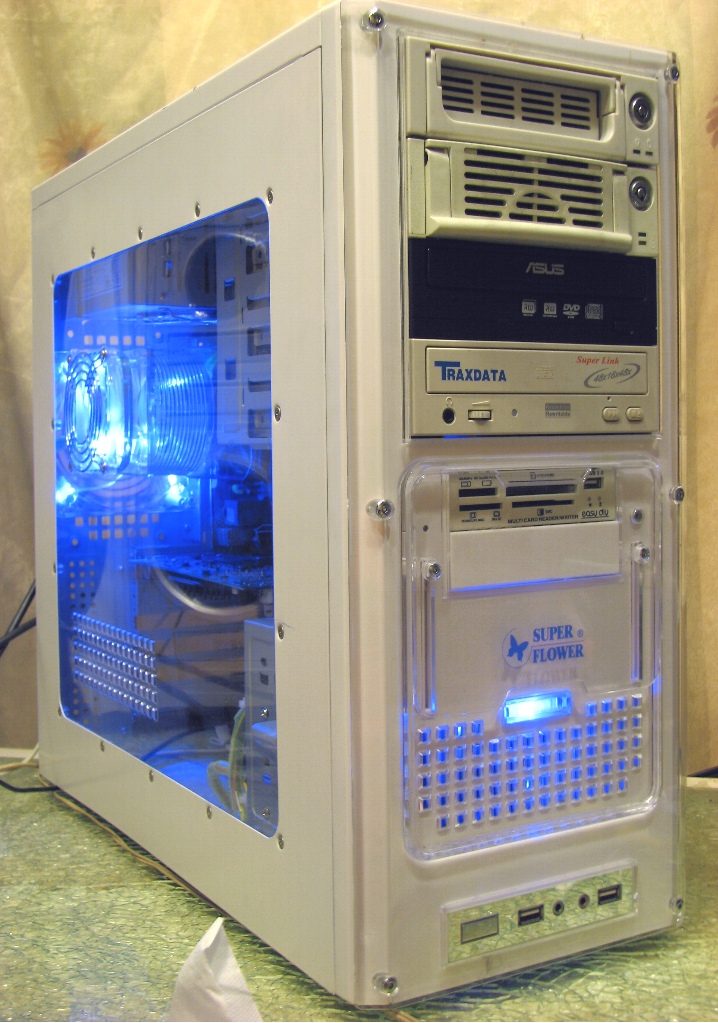
正面照来不及拆掉那两个丑丑的硬碟抽取盒..
侧面照
..感谢各位大大赏图..

..若喜欢我的努力..嘿嘿嘿..

..来朵鲜花鼓励鼓励吧..

谢谢..谢谢..

..

 图片大于 800K,请点击检视图片


